Designing Animations with UIViewPropertyAnimator in iOS 10 and Swift 3
This is part of a series of tutorials introducing new features in iOS 10, the Swift programming language, and the new XCode 8 beta, which were just announced at WWDC 16
UIKit in iOS 10 now has “new object-based, fully interactive and interruptible animation support that lets you retain control of your animations and link them with gesture-based interactions” through a family of new objects and protocols.
In short, the purpose is to give developers extensive, high-level control over timing functions (or easing), making it simple to scrub or reverse, to pause and restart animations, and change the timing and duration on the fly with smoothly interpolated results. These animation capabilities can also be applied to view controller transitions.
I hope to concisely introduce some of the basic usage and mention some sticking points that are not covered by the talk or documentation.
Building the Base App
We’re going to try some of the features of UIViewPropertyAnimator in a moment, but first, we need something to animate.
Create a single-view application and add the following to ViewController.swift.
import UIKit

class ViewController: UIViewController {
    // this records our circle's center for use as an offset while dragging
    var circleCenter: CGPoint!

    override func viewDidLoad() {
        super.viewDidLoad()

        // Add a draggable view
        let circle = UIView(frame: CGRect(x: 0.0, y: 0.0, width: 100.0, height: 100.0))
        circle.center = self.view.center
        circle.layer.cornerRadius = 50.0
        circle.backgroundColor = UIColor.green()

        // add pan gesture recognizer to
        circle.addGestureRecognizer(UIPanGestureRecognizer(target: self, action: #selector(self.dragCircle)))

        self.view.addSubview(circle)
    }

    func dragCircle(gesture: UIPanGestureRecognizer) {
        let target = gesture.view!

        switch gesture.state {
        case .began, .ended:
            circleCenter = target.center
        case .changed:
            let translation = gesture.translation(in: self.view)
            target.center = CGPoint(x: circleCenter!.x + translation.x, y: circleCenter!.y + translation.y)
        default: break
        }
    }
}
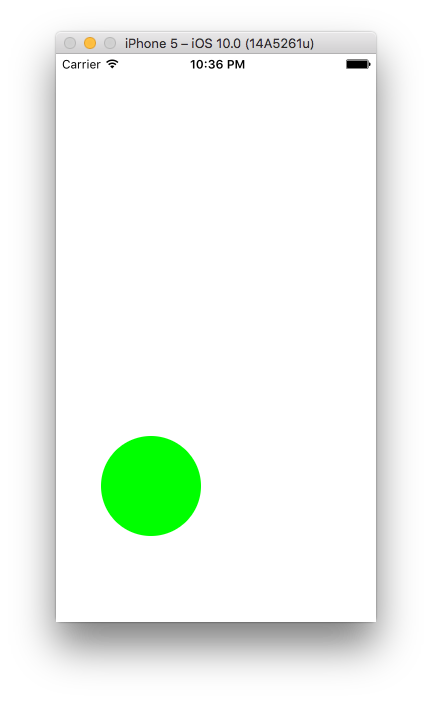
There’s nothing too complicated happening here. In viewDidLoad, we created a green circle and positioned in the center of the screen. Then we attached a UIPanGestureRecognizer instance to it so that we can respond to pan events in dragCircle: by moving that circle across the screen. As you may have guessed, the result is a draggable circle:
About UIViewPropertyAnimator
UIViewPropertyAnimator is the main class we’ll be using to animate view properties, interrupt those animations, and change the course of animations mid-stream. Instances of UIViewPropertyAnimator maintain a collection of animations, and new animations can be attached at (almost) any time.
Note: “UIViewPropertyAnimator instance” is a bit of a mouthful, so I’ll be using the term animator for the rest of this tutorial.
If two or more animations change the same property on a view, the last animation to be added or started* “wins”. The interesting thing is than rather than an jarring shift, the new animation is combined with the old one. It’s faded in as the old animation is faded out.
* Animations which are added later to a UIViewPropertyAnimator instance, or are added with a start delay override earlier animations. Last-to-start wins.
Interruptable, Reversible Animations
Let’s dive in and add a simple animation to build upon later. With this animation, the circle will slowly expand to twice it’s original size when dragged. When released, it will shrink back to normal size.
First, let’s add properties to our class for the animator and an duration:
// ...
class ViewController: UIViewController {
    // We will attach various animations to this in response to drag events
    var circleAnimator: UIViewPropertyAnimator!
    let animationDuration = 4.0
// ...
Now we need to initialize the animator in viewDidLoad::
// ...
// animations argument is optional
circleAnimator = UIViewPropertyAnimator(duration: animationDuration, curve: .easeInOut, animations: {
[unowned circle] in
    // 2x scale
    circle.transform = CGAffineTransform(scaleX: 2.0, y: 2.0)
})
// self.view.addSubview(circle) here
// ...
When we initialized circleAnimator, we passed in arguments for the duration and curveproperties. The curve can be set to one of four simple, predefined timing curves. In our example we choose easeInOut. The other options are easeIn, easeOut, and linear. We also passed an animations closure which doubles the size of our circle.
Now we need a way to trigger the animation. Swap in this implementation of dragCircle:. This version starts the animation when the user begins dragging the circle, and manages the animation’s direction by setting the value of circleAnimator.isReversed.
func dragCircle(gesture: UIPanGestureRecognizer) {
    let target = gesture.view!

    switch gesture.state {
    case .began, .ended:
        circleCenter = target.center

        if (circleAnimator.isRunning) {
            circleAnimator.pauseAnimation()
            circleAnimator.isReversed = gesture.state == .ended
        }
        circleAnimator.startAnimation()

        // Three important properties on an animator:
        print("Animator isRunning, isReversed, state: \(circleAnimator.isRunning), \(circleAnimator.isReversed), \(circleAnimator.state)")
    case .changed:
        let translation = gesture.translation(in: self.view)
        target.center = CGPoint(x: circleCenter!.x + translation.x, y: circleCenter!.y + translation.y)
    default: break
    }
}
Run this version. Try to make the circle “breathe”. Hold it down for a second..
A Sticking Point
Take a look at this video of our circle after it has made it all the way to the end of the animation:
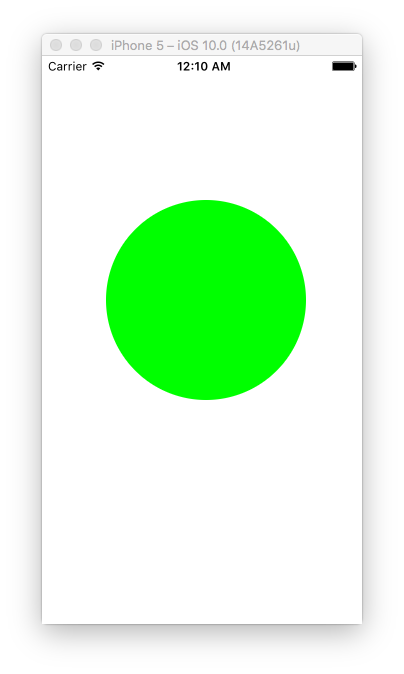
It’s not moving. It’s stuck in at the expanded size.
Ok, so what’s happening here? The short answer is that the animation threw away the reference it had to the animation when it finished.
Animators can be in one of three states:
- inactive: the initial state, and the state the animator returns to after the animations reach an end point (transitions to active)
- active: the state while animations are running (transitions to stopped or inactive)
- stopped: a state the animator enters when you call the stopAnimation: method (returns to inactive)
Here it is, represented visually:
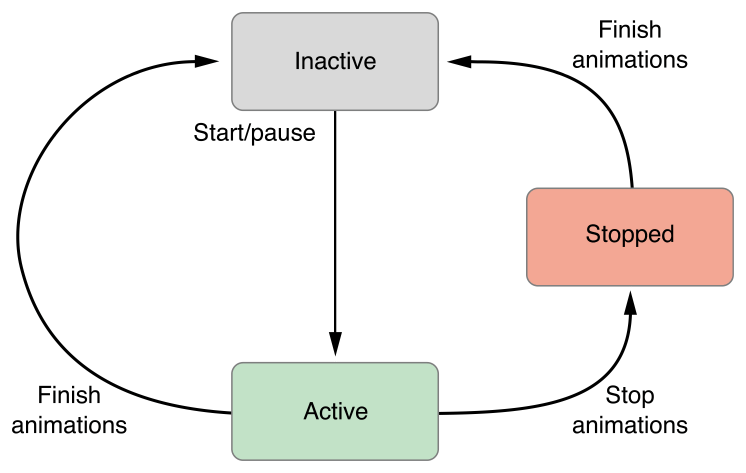
(source: UIViewAnimating protocol reference)
Any transition to the inactive state will cause all animations to be purged from the animator (along with the animator’s completion block, if it exists).
We’ve already seen the startAnimation method, and we’ll delve into the other two shortly.
Let’s get our circle unstuck. We need to change up the initialization of circleAnimator:
expansionAnimator = UIViewPropertyAnimator(duration: expansionDuration, curve: .easeInOut)
…and modify dragCircle::
// ...
// dragCircle:
case .began, .ended:
    circleCenter = target.center

    if circleAnimator.state == .active {
        // reset animator to inactive state
        circleAnimator.stopAnimation(true)
    }

    if (gesture.state == .began) {
        circleAnimator.addAnimations({
            target.transform = CGAffineTransform(scaleX: 2.0, y: 2.0)
        })
    } else {
        circleAnimator.addAnimations({
            target.transform = CGAffineTransform.identity
        })
    }

case .changed:
// ...
Now, whenever the user starts or stops dragging, we stop and finalize the animator (if it’s active). The animator purges the attached animation and returns to the inactive state. From there, we attach a new animation that will send our circle towards the desired end state.
A nice benefit of using transforms to change a view’s appearence is that you can reset the view’s appearance easily by setting its transform property to CGAffineTransform.identity. No need to keep track of old values.
Note that circleAnimator.stopAnimation(true) is equivalent to:
circleAnimator.stopAnimation(false) // don't finish (stay in stopped state)
circleAnimator.finishAnimation(at: .current) // set view's actual properties to animated values at this moment
The finishAnimationAt: method takes a UIViewAnimatingPosition value. If we pass start or end, the circle will instantly transform to the scale it should have at the beginning or end of the animation, respectively.
About Durations
There’s a subtle bug in this version. The problem is, every time we stop an animation and start a new one, the new animation will take 4.0 seconds to complete, no matter how close the view is to reaching the end goal.
Here’s how we can fix it:
// dragCircle:
// ...
case .began, .ended:
    circleCenter = target.center

    let durationFactor = circleAnimator.fractionComplete // Multiplier for original duration
    // multiplier for original duration that will be used for new duration
    circleAnimator.stopAnimation(false)
    circleAnimator.finishAnimation(at: .current)

    if (gesture.state == .began) {
        circleAnimator.addAnimations({
            target.backgroundColor = UIColor.green()
            target.transform = CGAffineTransform(scaleX: 2.0, y: 2.0)
        })
    } else {
        circleAnimator.addAnimations({
            target.backgroundColor = UIColor.green()
            target.transform = CGAffineTransform.identity
        })
    }

    circleAnimator.startAnimation()
    circleAnimator.pauseAnimation()
    // set duration factor to change remaining time
    circleAnimator.continueAnimation(withTimingParameters: nil, durationFactor: durationFactor)
case .changed:
// ...
Now, we explicitly stop the animator, attach one of two animations depending on the direction, and restart the animator, using continueAnimationWithTimingParameters:durationFactor:to adjust the remaining duration. This is so that “deflating” from a short expansion does not take the full duration of the original animation. The method continueAnimationWithTimingParameters:durationFactor:can also be used to change an animator’s timing function on the fly*.
* When you pass in a new timing function, the transition from the old timing function is interpolated. If you go from a springy timing function to a linear one, for example, the animations may remain “bouncy” for a moment, before smoothing out.
Timing Functions
The new timing functions are much better than what we had before.
The old UIViewAnimationCurve options are still available (static curves like easeInOut, which I’ve used above), and there are two new timing objects available: UISpringTimingParameters and UICubicTimingParameters
UISpringTimingParameters
UISpringTimingParameters instances are configured with a damping ratio, and an optional mass, stiffness, and initial velocity. These are all fed into the proper equation to give you realistically bouncy animations. The initializer for your view property animator will still expect a duration argument when passed an instance of UISpringTimingParameters, but that argument is ignored. The equation doesn’t have a place for it. This addresses a complaint about some of the old spring animation functions.
Let’s do something different and use a spring animator to keep the circle tethered to the center of the screen:
ViewController.swift
import UIKit

class ViewController: UIViewController {
    // this records our circle's center for use as an offset while dragging
    var circleCenter: CGPoint!
    // We will attach various animations to this in response to drag events
    var circleAnimator: UIViewPropertyAnimator?

    override func viewDidLoad() {
        super.viewDidLoad()

        // Add a draggable view
        let circle = UIView(frame: CGRect(x: 0.0, y: 0.0, width: 100.0, height: 100.0))
        circle.center = self.view.center
        circle.layer.cornerRadius = 50.0
        circle.backgroundColor = UIColor.green()

        // add pan gesture recognizer to circle
        circle.addGestureRecognizer(UIPanGestureRecognizer(target: self, action: #selector(self.dragCircle)))

        self.view.addSubview(circle)
    }

    func dragCircle(gesture: UIPanGestureRecognizer) {
        let target = gesture.view!

        switch gesture.state {
        case .began:
             if circleAnimator != nil && circleAnimator!.isRunning {
                circleAnimator!.stopAnimation(false)
            }
            circleCenter = target.center
        case .changed:
            let translation = gesture.translation(in: self.view)
            target.center = CGPoint(x: circleCenter!.x + translation.x, y: circleCenter!.y + translation.y)
        case .ended:
            let v = gesture.velocity(in: target)
            // 500 is an arbitrary value that looked pretty good, you may want to base this on device resolution or view size.
            // The y component of the velocity is usually ignored, but is used when animating the center of a view
            let velocity = CGVector(dx: v.x / 500, dy: v.y / 500)
            let springParameters = UISpringTimingParameters(mass: 2.5, stiffness: 70, damping: 55, initialVelocity: velocity)
            circleAnimator = UIViewPropertyAnimator(duration: 0.0, timingParameters: springParameters)

            circleAnimator!.addAnimations({
                target.center = self.view.center
            })
            circleAnimator!.startAnimation()
        default: break
        }
    }
}
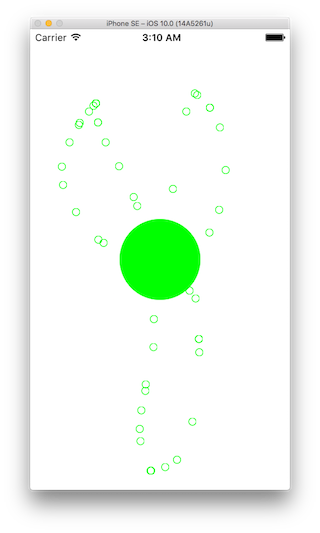
Drag the circle and let it go. Not only will it bounce back to the starting point. it will even keep the momentum it had when you released, since we passed a velocity argument to initialVelocity: when we initialized the spring timing parameters:
// dragCircle: .ended:
// ...
let velocity = CGVector(dx: v.x / 500, dy: v.y / 500)
let springParameters = UISpringTimingParameters(mass: 2.5, stiffness: 70, damping: 55, initialVelocity: velocity)
circleAnimator = UIViewPropertyAnimator(duration: 0.0, timingParameters: springParameters)
// ...
UICubicTimingParameters
UICubicTimingParameters allows you to set control points to define a custom cubic Bézier curve. Just note that coordinate points outside of 0.0 – 1.0 are trimmed to that range:
// Same as setting the y arguments to 0.0 and 1.0 respectively
let curveProvider = UICubicTimingParameters(controlPoint1: CGPoint(x: 0.2, y: -0.48), controlPoint2: CGPoint(x: 0.79, y: 1.41))
expansionAnimator = UIViewPropertyAnimator(duration: expansionDuration, timingParameters: curveProvider)
If you’re not happy with those timing curve providers, you can implement and use your own by conforming to the UITimingCurveProvider protocol.
Animation Scrubbing
You can manually set the progress of an paused animation by passing a value between 0.0 and 1.0* to your animator’s fractionComplete property. A value of 0.5, for example, will place the animatable properties halfway towards their final value, regardless of timing curve. Note that the position you set is mapped to the timing curve when you restart an animation, so a fractionComplete of 0.5 does not necessarily mean the remaining duration will be half of the original duration.
Let’s try out a different example. First, let’s initialize our animator at the bottom of viewDidLoad: and pass in two animations:
// viewDidLoad:
// ...
circleAnimator = UIViewPropertyAnimator(duration: 1.0, curve: .linear, animations: {
    circle.transform = CGAffineTransform(scaleX: 3.0, y: 3.0)
})

circleAnimator?.addAnimations({
    circle.backgroundColor = UIColor.blue()
}, delayFactor: 0.75)
// ...
We aren’t going to call startAnimation this time. The circle should get larger as the animation progresses and start turning blue at 75%.
We need a new dragCircle: implementation as well:
func dragCircle(gesture: UIPanGestureRecognizer) {
    let target = gesture.view!

    switch gesture.state {
    case .began:
        circleCenter = target.center
    case .changed:
        let translation = gesture.translation(in: self.view)
        target.center = CGPoint(x: circleCenter!.x + translation.x, y: circleCenter!.y + translation.y)

        circleAnimator?.fractionComplete = target.center.y / self.view.frame.height
    default: break
    }
}
Now we’re updating the animator’s fractionComplete to the circle’s vertical position on the view as it’s dragged:
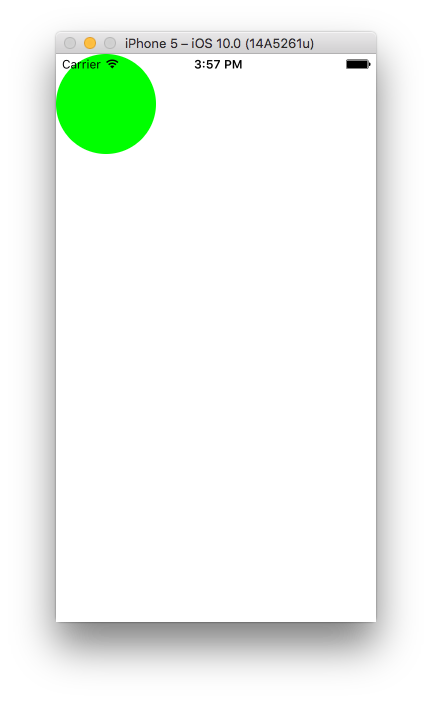
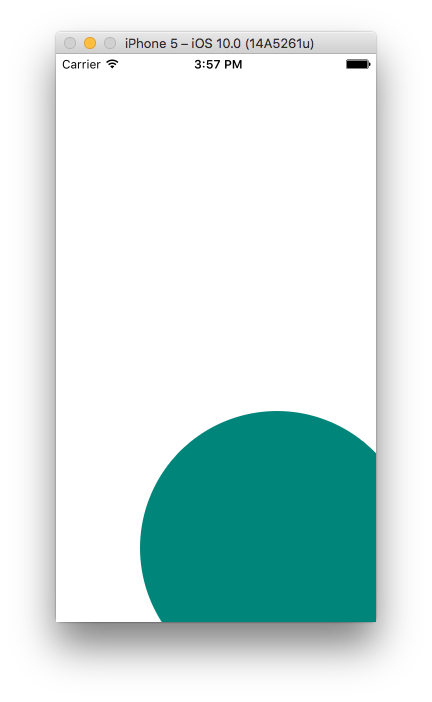
I’ve used the linear timing curve, but this sample would be a good way to get a feel for other curves or a timing curve provider instance. The animation that changes the circle blue follows a compressed version of the animator’s timing curve.
* Custom animators can accept value outside of range 0.0 – 1.0, if they support animations going past their endpoints.
Extensibility
Finally, one of the most interesting things about this release was the apparent philosophy behind it. Don’t like something? Change it. Animation providers and timing curves providers can both be replaced with your own implementation, for example.
In fact, this is almost more of a release of protocols than classes. The underlying protocols got about as much fanfare as everything else, which is great. I love this direction of making more and more built-in functionality accessible to the developer. I’m hoping we see more in the future, and I’m looking forward to seeing what people do with this.