This post has been updated for compatibility with XCode 8 and iOS 10
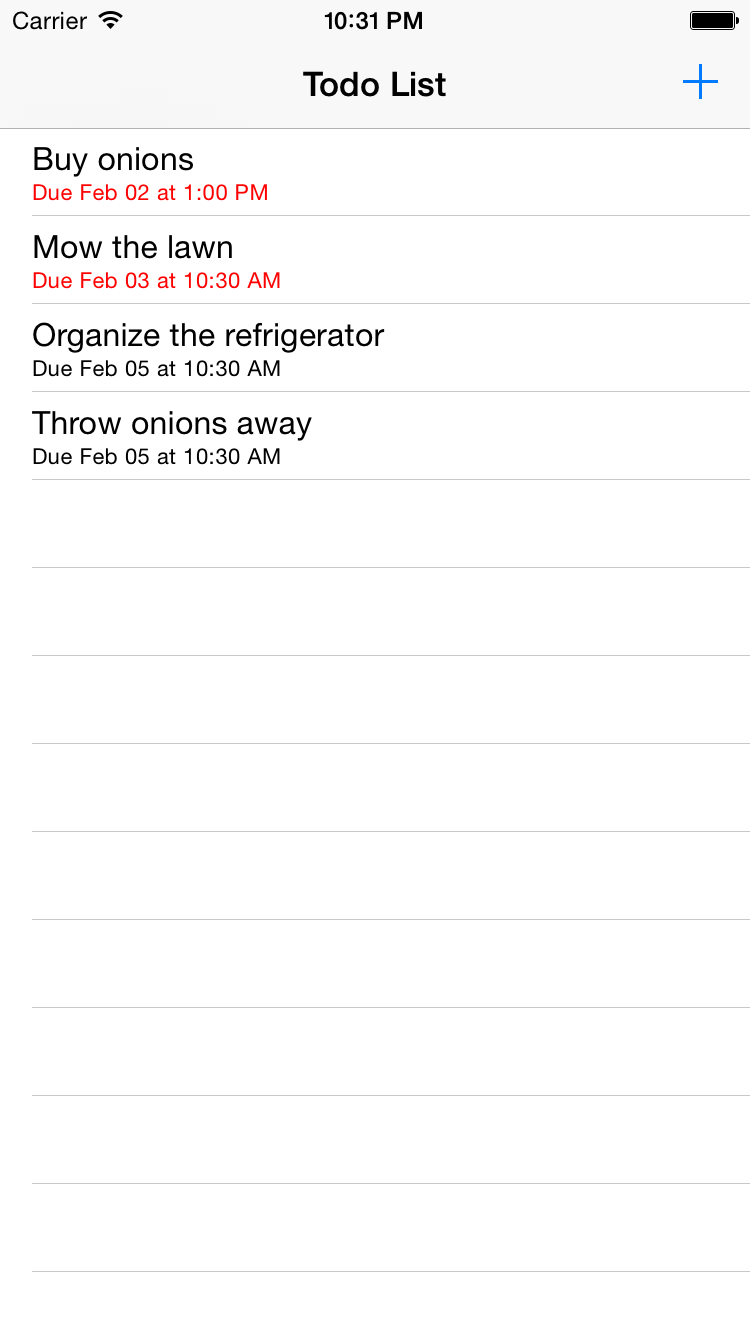
In part 1 of this series, we created a simple to-do list application that used local notifications to alert users when to-do items were overdue. This time, we’re going to build on that the project by enabling application icon badges to display the number of overdue items and add support for notification actions, allowing our users to complete and edit to-do items without even opening the app.
You can download the source code for part 1 here.
Badging the App Icon
It bears mentioning that we can badge the app icon without using local notifications. The applicationWillResignActive: method in AppDelegate is a good place to do so, since it will be fired just before the user returns to the home screen where they can see the app icon.
func applicationWillResignActive(_ application: UIApplication) { // fired when user quits the application
    let todoItems: [TodoItem] = TodoList.sharedInstance.allItems() // retrieve list of all to-do items
    let overdueItems = todoItems.filter({ (todoItem) -> Bool in
        return todoItem.deadline.compare(Date()) != .orderedDescending
    })
    UIApplication.shared.applicationIconBadgeNumber = overdueItems.count // set our badge number to number of overdue items
}
This is a good start, but we need the badge number to automatically update when to-do items become overdue. Unfortunately, we can’t instruct the app to simply increment the badge value when our notifications fire, but we can pre-compute and provide a value for the “applicationIconBadgeNumber” property of our local notifications. Lets provide a method in TodoList to set an associated badge number for each notification.
func setBadgeNumbers() {
    let scheduledNotifications: [UILocalNotification]? = UIApplication.shared.scheduledLocalNotifications // all scheduled notifications
    guard scheduledNotifications != nil else {return} // nothing to remove, so return

    let todoItems: [TodoItem] = self.allItems()

    // we can't modify scheduled notifications, so we'll loop through the scheduled notifications and
    // unschedule/reschedule items which need to be updated.
    var notifications: [UILocalNotification] = []

    for notification in scheduledNotifications! {
        print(UIApplication.shared.scheduledLocalNotifications!.count)
        let overdueItems = todoItems.filter({ (todoItem) -> Bool in // array of to-do items in which item deadline is on or before notification fire date
            return (todoItem.deadline.compare(notification.fireDate!) != .orderedDescending)
        })

        // set new badge number
        notification.applicationIconBadgeNumber = overdueItems.count
        notifications.append(notification)
    }

    // don't modify a collection while you're iterating through it
    UIApplication.shared.cancelAllLocalNotifications() // cancel all notifications

    for note in notifications {
        UIApplication.shared.scheduleLocalNotification(note) // reschedule the new versions
    }
}
There’s no way to update a scheduled notification, but you can achieve the same effect by simply canceling the notification, making your changes and rescheduling it.
The applicationIconBadgeNumber property can accept values up to 2,147,483,647 (NSIntegerMax), though anything over five digits will be truncated in the icon badge. Setting it to zero or a negative number will result in no change.
Now we just need to call this method when our to-do list changes. Add the following line to the bottom of addItem: and removeItem: in TodoList
self.setBadgeNumbers()
Now, when a notification fires, the badge number will be automatically updated.
Repeating Notifications
UILocalNotificaiton instances have a repeatInterval property that we can use to, unsurprisingly, repeat a notification at a regular interval. This is a good way to get around the 64 notification limit in some cases; a repeating notification is only counted against it once.
Unfortunately, we have to choose between using repeatInterval and applicationIconBadgeNumber in this app. Badge numbers are set on the application icon each time a notification is fired. Older notifications could end up “out of phase” with newer notifications and actually lower the badge number when repeated. We could get around this by scheduling two notifications for each to-do item, a repeating notification that displays the alert and plays the sound, and a non-repeating notification that updates the badge count, but this would cut the number of to-do items we could schedule in half.
The biggest limitation with repeating notifications is that the repeatInterval doesn’t accept a custom time interval. You have to provide an NSCalendarUnit value like “HourCalendarUnit” or “DayCalendarUnit”. If you want a notification to fire every 30 minutes, for example, you’ll have to schedule two notifications (offset by 30 minutes) and set them both to repeat hourly. If you want it to fire every 31 minutes, then you’re out of luck.
Performing Actions in the Background
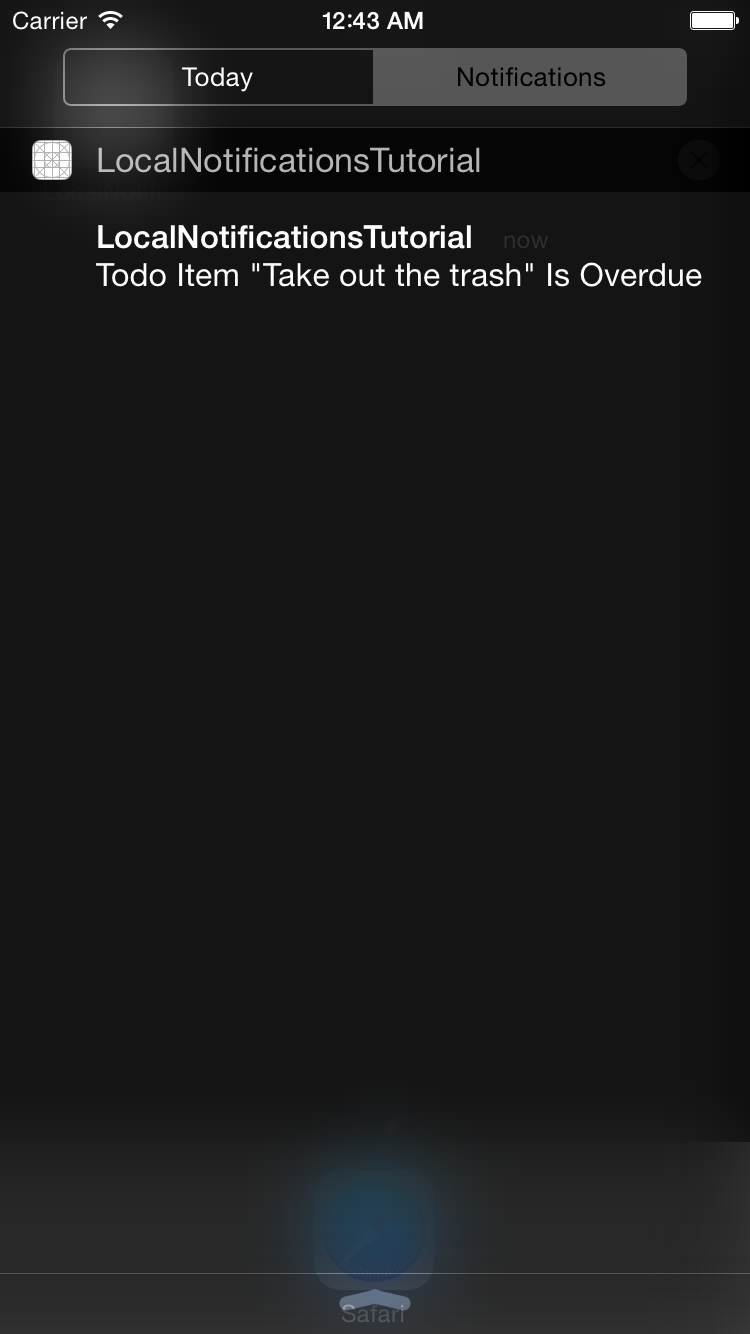
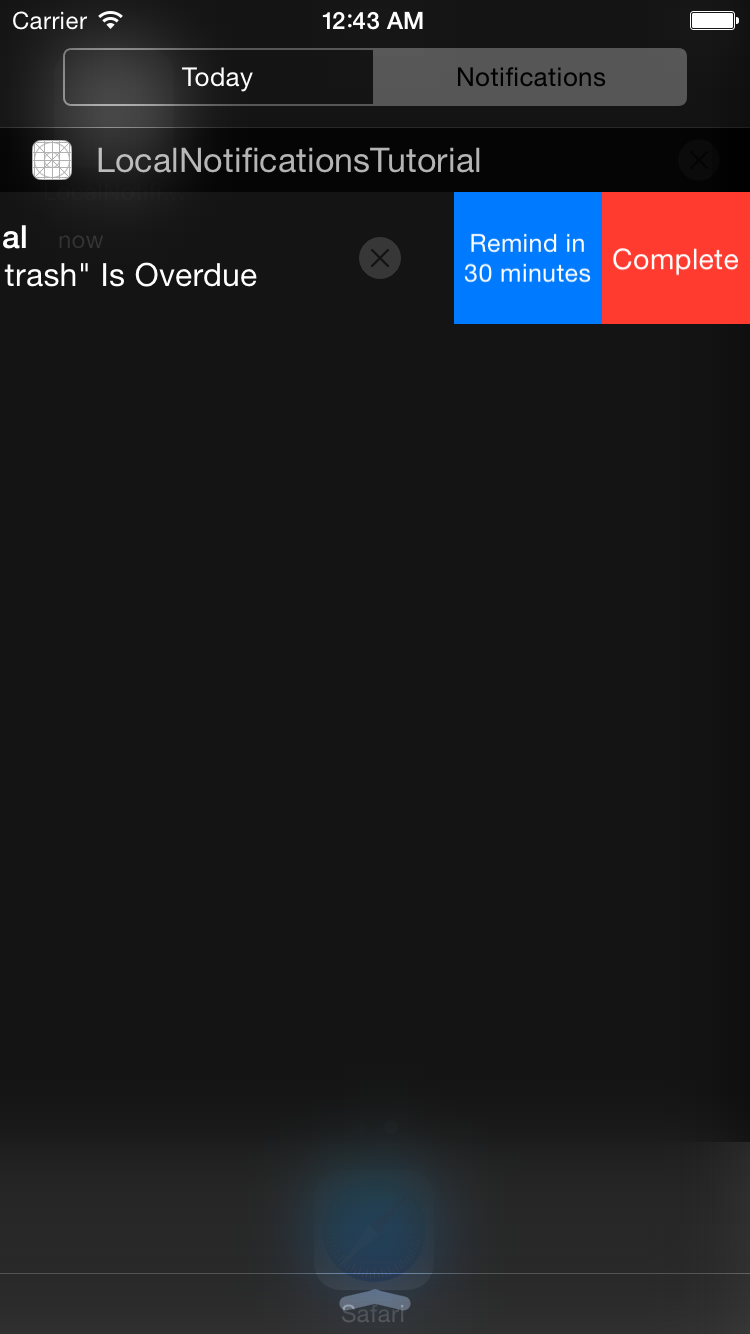
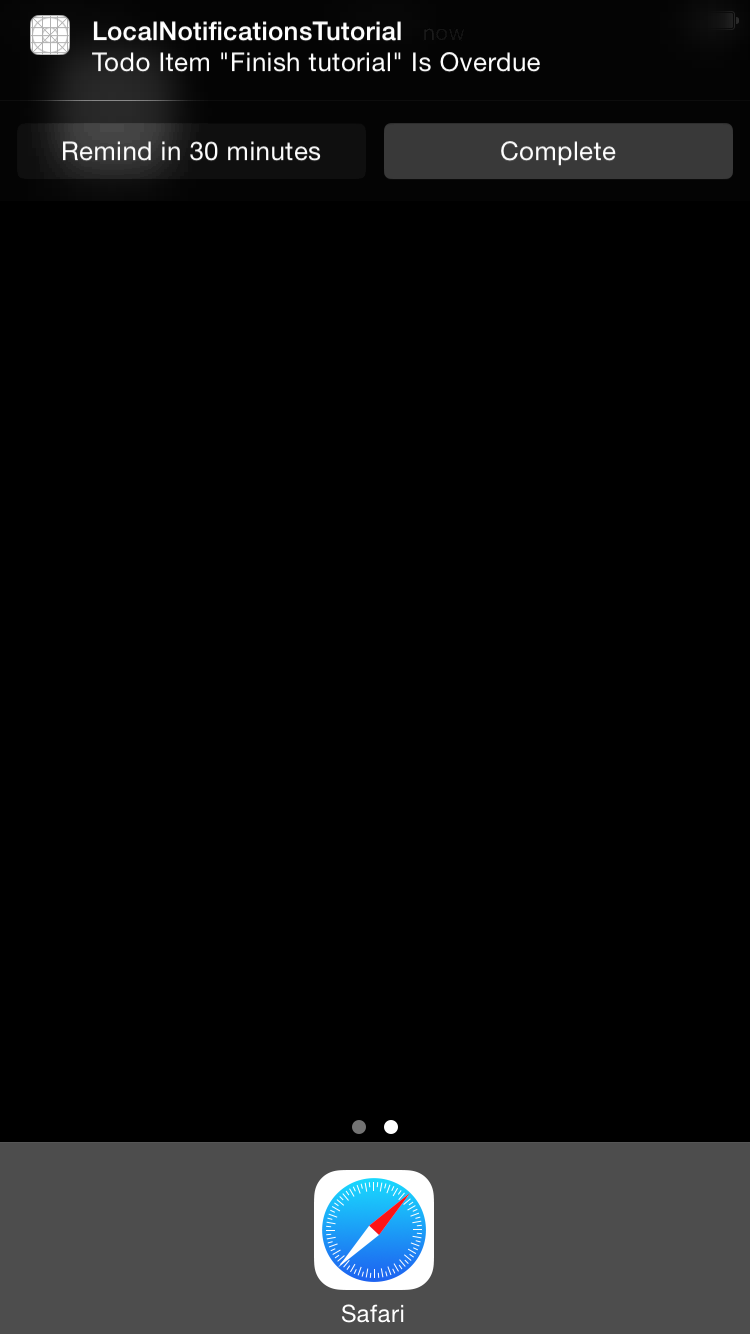
iOS 8 introduced a really useful new feature, notification actions, which let our users trigger code execution without even having to open the app. Lets give our users the ability to complete and schedule reminders for to-do items directly from the notification banner.
In AppDelegate:
func application(_ application: UIApplication, didFinishLaunchingWithOptions launchOptions: [UIApplicationLaunchOptionsKey : Any]? = nil) -> Bool {
    let completeAction = UIMutableUserNotificationAction()
    completeAction.identifier = "COMPLETE_TODO" // the unique identifier for this action
    completeAction.title = "Complete" // title for the action button
    completeAction.activationMode = .background // UIUserNotificationActivationMode.Background - don't bring app to foreground
    completeAction.isAuthenticationRequired = false // don't require unlocking before performing action
    completeAction.isDestructive = true // display action in red

    let remindAction = UIMutableUserNotificationAction()
    remindAction.identifier = "REMIND"
    remindAction.title = "Remind in 30 minutes"
    remindAction.activationMode = .background
    remindAction.isDestructive = false

    let todoCategory = UIMutableUserNotificationCategory() // notification categories allow us to create groups of actions that we can associate with a notification
    todoCategory.identifier = "TODO_CATEGORY"
    todoCategory.setActions([remindAction, completeAction], for: .default) // UIUserNotificationActionContext.Default (4 actions max)
    todoCategory.setActions([completeAction, remindAction], for: .minimal) // UIUserNotificationActionContext.Minimal - for when space is limited (2 actions max)

    // we're now providing a set containing our category as an argument
    application.registerUserNotificationSettings(UIUserNotificationSettings(types: [.alert, .badge, .sound], categories: Set([todoCategory])))
    return true
}
Notice that we’re calling todoCategory.setActions() twice, once for each of the two available action contexts. If your users are displaying notifications from your app as banners, then the actions in the minimal context will be displayed. If notifications are displayed as alerts (the “default” context), up to four actions will be displayed.
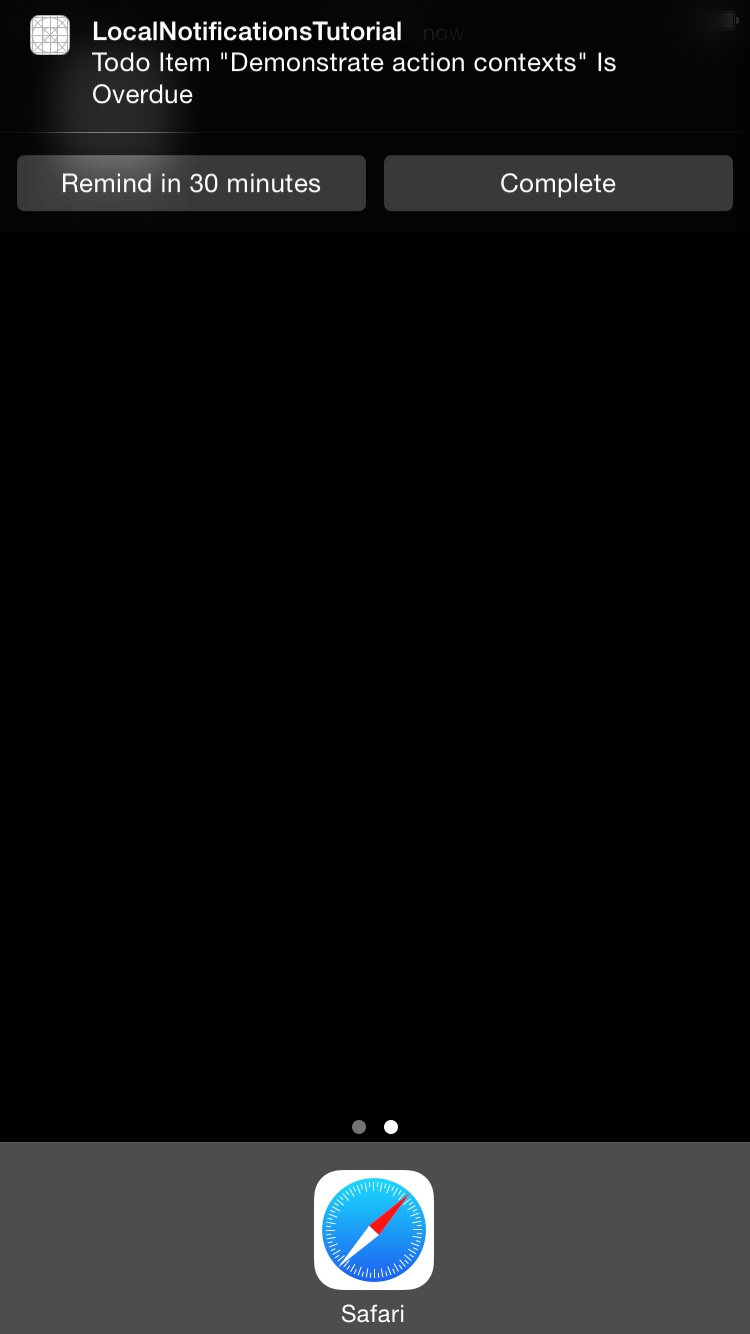
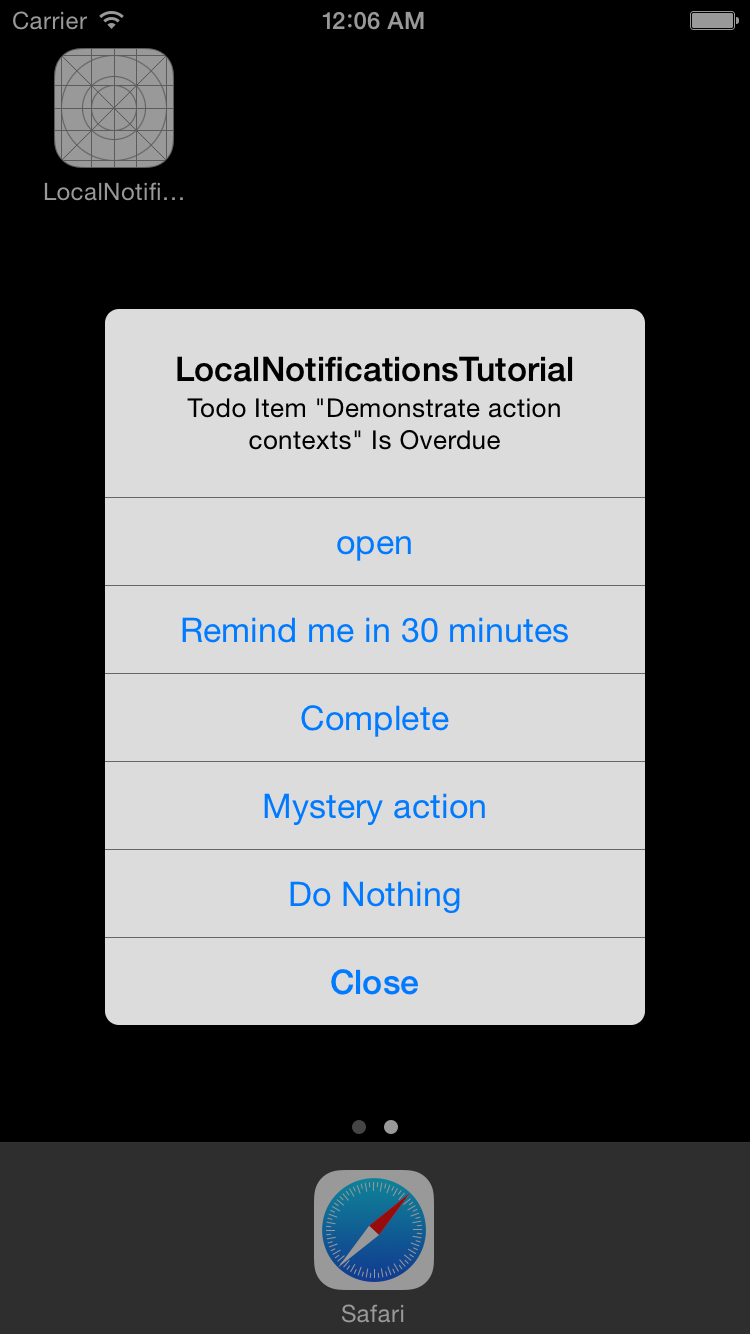
The order of the actions in the array we pass to setActions: is the order that the actions will be displayed in the UI, though, oddly, the items are ordered right-to-left in the minimal context.
Lets make sure to set this category for the notification we’re scheduling in TodoList’s addItem: method.
notification.category = "TODO_CATEGORY"
We already have a method for “completing” to-do items, removeItem:, but we need to implement one for scheduling a reminder in TodoList.
func scheduleReminder(forItem item: TodoItem) {
    let notification = UILocalNotification() // create a new reminder notification
    notification.alertBody = "Reminder: Todo Item \"\(item.title)\" Is Overdue" // text that will be displayed in the notification
    notification.alertAction = "open" // text that is displayed after "slide to..." on the lock screen - defaults to "slide to view"
    notification.fireDate = Date(timeIntervalSinceNow: 30 * 60) // 30 minutes from current time
    notification.soundName = UILocalNotificationDefaultSoundName // play default sound
    notification.userInfo = ["title": item.title, "UUID": item.UUID] // assign a unique identifier to the notification that we can use to retrieve it later
    notification.category = "TODO_CATEGORY"

    UIApplication.shared.scheduleLocalNotification(notification)
}
Note that we aren’t changing the due date on the to-do item (or trying to cancel the original notification – it’s been automatically removed). Now we just have to jump back to AppDelegate and implement a handler for the actions:
func application(_ application: UIApplication, handleActionWithIdentifier identifier: String?, for notification: UILocalNotification, completionHandler: @escaping () -> Void) {
    let item = TodoItem(deadline: notification.fireDate!, title: notification.userInfo!["title"] as! String, UUID: notification.userInfo!["UUID"] as! String!)
    switch (identifier!) {
    case "COMPLETE_TODO":
        TodoList.sharedInstance.remove(item)
    case "REMIND":
        TodoList.sharedInstance.scheduleReminder(forItem: item)
    default: // switch statements must be exhaustive - this condition should never be met
        print("Error: unexpected notification action identifier!")
    }
    completionHandler() // per developer documentation, app will terminate if we fail to call this
}
Go ahead and try it out now (you may want to pass a lower value to dateByAddingTimeInterval: for testing purposes).
We’ve covered all of the non-geographic functionality of UILocalNotification and now have a pretty full-featured to-do list app, so this concludes our series. You can download the full source code for this project from here.
Hello,
Thanks for this tutorial, it was very helpful. Just one thing, in the part 1, you forgot to add a title to notification.userInfo and it result to an unwrapping error in this part, when you create a new item in applicationHandleActionWithIdentifier.
Thanks. Sometimes code gets copied back and forth a few times and it’s easy to mix in an older version. I have just updated both for XCode 7.3.1, so that and other issues should be resolved.